Showing posts with label DIY. Show all posts

Friday, 26 July 2013

CRAFT - Jellyfish!


So it's been very quiet on the blog, but not quiet at home! Now that I've returned to work, it is busy all the time. But today I wanted to quickly share with you this fun easy little project I did with the kids on weekend.

You'll need:

  • Paper
  • Ice cream lid/paper plate
  • Scissors
  • Glue
  • Marker
Simply rip paper and glue to the plate or lid to make the body. Cut tentacles my creating spirals and glue them on the back. Create your face! It's that easy, but the kids loved every minute of it.


Saturday, 2 March 2013

DIY: Make a Dinner Planner!


Having a dinner planner for the week has made things a lot easier! Here's why:

Planning
Everyone in the house knows what we're having for the night. It is quick and easy to pull something out of the freezer for defrosting. We have enough variety to cover a month so we don't keep having the same meals.


Shopping
Having a shopping list attached to your planner makes it so simple to get products required without forgetting anything! 

Save Money
If you shop for the week, you will be reducing trips to the grocery store and saving money! We all have impulsive buys, whether it is $1 or $20 - but if you added those up over a year, I bet you'd be shocked. If you eliminate the need to go to the shops every day, you will save a lot of money. Try it!

DIY
Here's a quick guide how I made mine. 
  • I cut up a diaper box
  • Spray painted the cardboard and drew flowers on the background
  • Printed menu items, laminated and cut them
  • Super glued mini pegs from Officeworks
  • Used scrapbooking stickers to decorate
  • Made a pocket out of paper for the menu items
  • Super glued a pretty sticky notepad for shopping list
I hope this inspires you to get creative! :)

Tuesday, 12 February 2013

DIY Pillow Bed Tutorial

Let's make a Pillow Bed!


I was recently inspired by some photos I saw around Pinterest on Pillow Beds! The only problem was that the company's that make these charges a fortune - $145+! So if you would rather DIY for free, or a fraction of the cost - let's do it!

FREE VERSION - Use an old doona cover, sheets or any decent sized fabrics that would be suitable. Use old pillows you have for the inserts

CHEAP VERSION - Buy material (I used 2 pieces of 2m x 1.2m on the small one and 2 pieces of 2.5 x 1.2m on the larger one). Buy pillows to insert! I bought cheap basic pillows from KMART.

OK, here goes. I am not fantastic on tutorials, so I took the time to draw a version and then created a 'mini' version (pinned not sewn) to try to make my explanation work!


and for the photo versions (remember this is a MINI version!) ...


If all went well you should have a wonderful Pillow Bed like so!


I made the head part just slightly wider to allow for 2 pillows.

Please comment if u have any questions or need clarification. Happy sewing!

Don't forget to follow us on Facebook!

Wednesday, 21 November 2012

Get Organized for Christmas!

Christmas is fast approaching and it's time to get organized for Christmas. Check out our Facebook Christmas Album with round ups of ideas from Pinterest and Google.


*Please advise if you are the original owner of any content so we can reference you accordingly*

Friday, 28 September 2012

DIY: Make a Vegie Patch!


It's Spring School Holidays over in Australia, and what better way to entertain your kids for a few hours than to plant some vegies! The kids can help look after them, watch them grow and by the end, everyone reaps the rewards by eating nutritious organic vegetables or fruits!

This is also perfect for those of you in a rental property. My husband is a carpenter by trade so he knocked up a vegie patch with scrap timber that didn't contact the grass so as not to kill it. Another idea we had (and only decided against this one as it was a given that our 2 cats would be heading straight down to the garden to dig and poop!) was to drill hole in the bottom of a children's plastic clam and use that as a vegie patch. SO much cheaper and easier than purchasing those proper vegie garden setups that start at around $150.00. The clams only cost $20 at BIG W, Kmart and Target. Here is an example of a clam/shell from BIG W:

I promise it is worth the few hours you'll spend setting it up and really, you can be so thrifty it shouldn't cost you much at all! We chose to buy 'easy-grow' vegies that were seedlings.


At first one makeshift box was enough for our babies to get started, but as we soon realised - they were growing up fast and within 2 weeks my husband was making a lot more boxes! So maybe start off with a few if you won't be able to transfer them into bigger pots or purchase more shells as they will need to planted well apart if you don't want to 'dig them out'.

So 3 weeks later here's a look at how our vegies are coming along. We are all loving watching them grow and are pretty proud we haven't lost any of them to death as yet! You'll be able to see just how much we had to spread them out because they are growing so fast.

Left to right: 4 x Tomatoes, 4 x Spring Onions, 3 x Corn

Strawberries

Here come our strawberries

The first tomato is on its way.

Capsicums

Bunches of capsicums are beginning to grow
So there we have it, fairly simple, organic, good for you and the kids and of course - a great learning experience! Why not try it out?!

Happy SPRING!

Don't forget to follow us on Facebook

Saturday, 2 June 2012

DIY: Beach Themed Canvas

A few weeks back I saw a great beach themed canvas with fun words in one of my favourite shops! I desperately wanted to buy it, but when realising it was $95.00 - I knew I could make it myself for less than 1/4 of that price so I put on my DIY hat and got painting.

STEP 1
I purchased a canvas and used acrylic paint. I painted the background using a wipe cloth!

STEP 2
I then started painting the words using different sized stencils

STEP 3
I thought the stencil would be enough but later realised it needed to be neater! So I used a paint pen to create a neat edge around the letters.

FINAL PRODUCT!
Here it is completed! I am looking forward to finding somewhere in our new home to place it!

Like this project? Add it to Pinterest!

Don't forget to follow us on Facebook

Monday, 28 May 2012

Ideas and Tips

From around the web and Pinterest!

 The perfect solution for storing boots


Use CD racks to store lids in the cupboard


Cable storage!


Cable storage for the unused ones!


Fluff your carpet with a fork.


DIY charging station


Use paper clips to hold cables up.


Use an old wipes case to carry crayons


A laundry bag with little pieces for the dishwasher.


A file rack to store chopping boards.


A cereal container as a bin in the car!


Cupboard storage


A magnetic make-up board


Perfect storage for the pantry


Store sheet sets in one of the pillow cases to keep the set together.


Paint the bottom of metal containers with clear nail polish to avoid rust spots


Tissues plus a make-shift bin!


Get an old brick, cover in paper - TA DA! Book end!


Use a hotel shower cap to store shoes in while travelling


There you have it! Some of the best ideas I have come across so far and have used. I hope you enjoy them and are able to implement these into your life.

Saturday, 19 May 2012

TIPS: Decorating a Rental Pt 1

"I can't make my rental have a wow factor." WRONG! 

So as many of you may have experienced, decorating a rental property inside and out can be quite frustrating due to the never ending rules within your lease. You want to paint something, you want to hang pictures, you want to change their disgusting curtains or even rip up their awful carpet. Don't worry, you're not alone!

I can't change the rules and regulations, but I can certainly give you some ideas to get around them! Here I'll show you a few simple ways to decorate a rental without 'breaking' the property, or your budget!

Balcony Pots for the Railing!
Perfect for an apartment. Available at http://www.greenbo.com.au/

Hanging Vegetable Garden
Use guttering to create the perfect vegetable garden. Make them higher if you need to keep them away from little hands or paws

Extra Storage Space
Perfect for those smaller areas that are just wasted space.


DIY Hoop Chandelier
Create this centrepiece chandelier by wrapping fairy lights or even christmas lights around a hoop!


Fabric Wall Coverings
Using fabric to create a feature wall without any need to paint is simply genius. Here are some examples that I really love. You coulkd hang fabric on curtain rods, using 3M removable hooks. Or if it is light even using drawing pins could work. Sky is the limit!
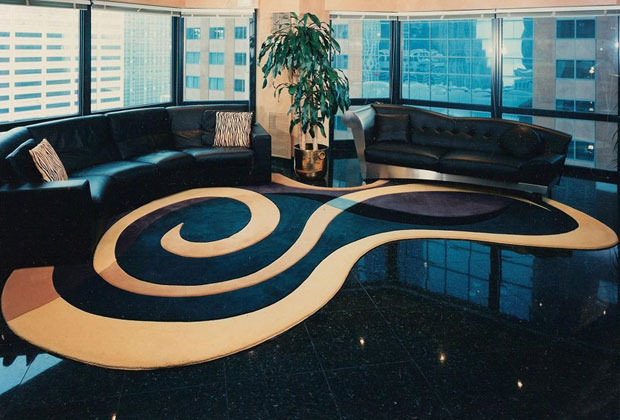


Area Rugs
Area rugs do wonders for unsightly carpets and can make the room appear larger. Always make sure the rug is large enough to go under the front feet of your lounge to create the desired effect.


One of my Own
Here is my favourite wall in my own home. This was a plain white wall in a very large room. The room felt draining with all that white so I dressed it with fringe curtains with a nice centre picture to balance it out. The fringe curtains are on curtain rods held up by 3M removable hooks.


Fake Plants
These add colour and ambiance to any home. No watering required. Just occasionally dust the leaves! No need for dirt to go all over the place, no stains on the floor when you move... they really are a simple but effective way to brighten any home. If you believe in Feng Shui they are also great for good Chi.


I hope some of these ideas have inspired you to create a space in your home that reflects your style, makes you comfortable and most importantly does not damage your rental in the process! Stay tuned for the next installment!